Snowy Soo
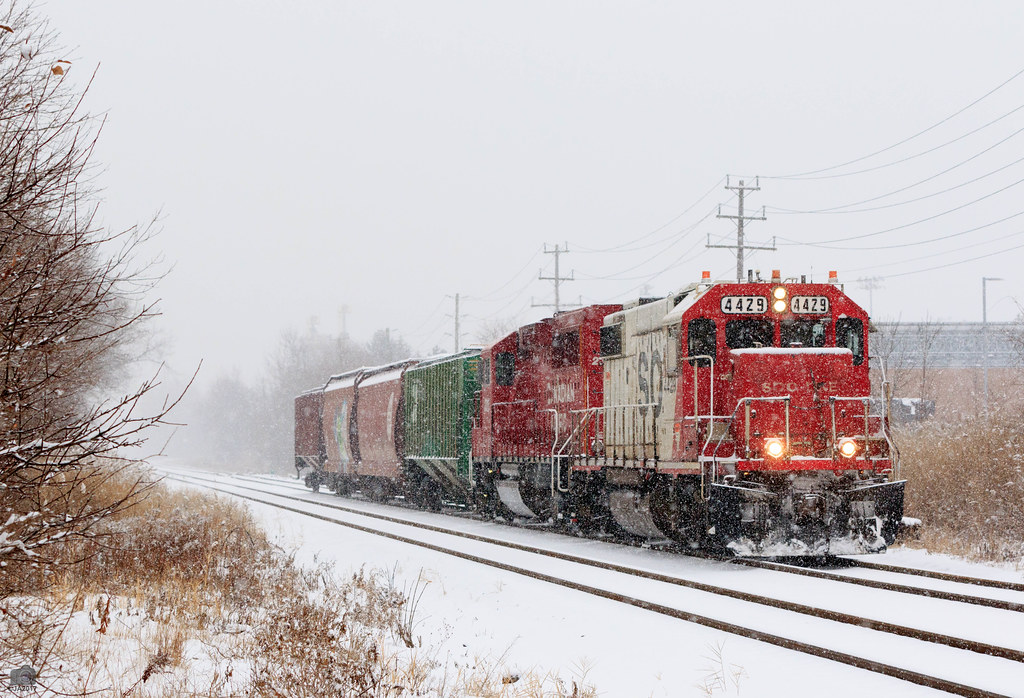
Wednesday, 30 October 2013
Layout update coming, in the meantime
Greetings everyone,
I've managed to make some progress with the layout recently and an update is in the works.
In the meantime, enjoy this video which I think really illustrates the importance of always taking great care when handling a new locomotive.

Saturday, 31 August 2013
Railfanning the Junction
 |
| Things were moving right along at Lambton on Saturday. |
A commenter to this blog recently said he'd heard that Lambton Yard had closed and asked whether I knew if this was true.
I don't know the answer to his question but sometimes after stopping in and seeing long stretches of empty tracks at the yard, I wonder myself. There's been times the yard tracks are empty and no power is parked in its usual spot near the southwest corner of Runnymede Park.
Canadian Pacific Railway is undergoing an intense slimming down under CEO (and former CN boss) Hunter Harrison. This excellent story in Canadian Business magazine spells out some of Harrison's sweeping plans to streamline the railway's operations. They include selling off locomotives, trimming the payroll and closing certain yards, though Lambton is not mentioned specifically in the story.
I spent much of a sunny, humid Saturday on my bike photographing and railfanning movements in and around the yard and I'm happy to report it was a busy place with lots of freight moving. Of course, much of this traffic involved trains moving past the yard along the main but there was a lift, a crew change at the office and some power parked in its usual place in the few hours I was there.
So hopefully Lambton will remain a busy place, with lots of switching to see. Watching trains roll at this location is always a good source of inspiration as I attempt to model part of this area.
Here are some pictures of the excursion in sweltering weather.
AC44CW awaits its next assignment
 |
| I've seen this AC44CW sitting at Lambton a few times in recent weeks. This shot was taken through the fence from the Wal-Mart parking lot. Are they using this big guy for yard work? |
Yard power ready to roll
 |
| CP 5994, an SD40-2 parked in the power spot |
The following images are from one train that arrived from the west, changed crews at Lambton, then rolled north through the diamond after leaving the yard
Lead unit a leased unit
 |
| This leased CEFX unit led a long train out of Lambton and north at the diamond. |
Always fun to see a lash-up with leased power. This one led an easbound into Lambton where it changed crews before heading north up the diamond with a long train.
These leased units really get around. This flicker image shows CEFX 1051 working in Romulus, MI, back in Sept. 2011.
Steel coil cars
This was a long train (I didn't count the cars). The entire lead end was a long cut of these steel coil cars, like this one:
 |
| There must have been 100 of these cars alone. |
Great tags
Some of the cars on this train I shot because they had great tags. I often crop these image tags, print them out on photo paper and use them on models. I describe that process here.
 |
| Nice bright colours on this boxcar. Modellers, you have my permission to right click and 'steal' this tag for use in your fleet! It's not like the artist (vandal) will come after you for copyright! |
 |
| I liked this tag too. The blue robot thingy would look good on a model. |
 |
| Que Seca, Seca. This would look great on an auto rack model too. |
 |
| Another nice bright auto rack tag you could use. Sorry that I cut off the right side. This is why shooting stationary rolling stock is better for using the tag. |
Auto-Max cars
We make a lot of vehicles here in Ontario. Here's two tight shots of some AutoMax monsters. Again, all this rolling stock was in the same train.
 |
| These Auto-Max cars stack autos on three levels. |
 |
| We're not in Kansas anymore. |
Hey, how did you get Soo rusty?
 |
| The guys over at the Rustbucket forum might want to take a look at this Soo boxcar. |
As for the layout? I've been pecking away that the wiring and track laying. Though it's hot and sticky now the cool fall weather is surely on its way. Before we all know it the snow will start flying and modelling season will resume.
Thursday, 15 August 2013
The allure of modular model railroading
 |
| As a member of a modular club, I would only be "partly" responsible if the layout is terrible! |
Many report struggles with other members who are overly rigid about the adherence to a particular prototype, strict layout
standards, etc. At the other end of the scale, others complain about members
who are too flippant in their approach to modeling. It seems most
club members have experienced at least some level of squabbling, difficult
personalities and political infighting.
I’m sure most of you know how this goes. One member wants to
model the transition era of a specific railroad; the other wants the rules
relaxed so modern diesels can run alongside steam locomotives (including an HO
version of Thomas the Tank Engine). Some members want a longstanding club to
make the switch to DCC; others don’t see the sense in spending money to replace
a block control system that’s worked well for years.
Almost any group, in any hobby, experiences these kinds of
issues. It’s hard, if not impossible, to get a group of people who all want to
row the boat in the same direction at all times.
This is partly what makes modular model railroading so
appealing to me. You’re still part of a group, still get to run trains and
share the hobby with others, but you’re also free to do what you want with your
little bit of the layout (within the design standard parameters of course).
You can model as much or as little as you want, see and learn from what others have done and when the day’s done, your layout comes home with you (in
most cases). Any interpersonal annoyances are minimized because you don’t have
to iron out the intricacies of layout planning with three dozen other people.
Like anything, there are tradeoffs. My sense is that it’s
more difficult for a modular club to achieve the same level of realism as a
permanent club layout whose members have all agreed to put their collective efforts
toward recreating a particular prototype.
Take the Waterloo Region Model Railway Club as an example. Although
based in southwestern Ontario, the club models Canadian Pacific operations in
Northern Ontario in the 1970s. I’ve not seen the layout myself but the results
look amazing on the club’s website.
Obviously every member has agreed to this plan and as a
statement on the club’s website explains, the adherence to such a specific prototype
has actually helped the membership avoid infighting.
“By choosing a specific prototype, no one
individual or internal group could determine what the WRMRC will or will not
model, because the prototype railway has already dictated how it must be done,”
reads the statement. “The
decision to model a prototype freed us from a lot of undesirable politics, and
united us towards a common goal.”
Interesting. Still I’m keen on checking out an HO scale modular
club, which I also think better suits my (rather limited) skills as a modeller. There doesn’t appear to be one in Toronto proper, but if anyone knows of one or is
interested in talking about it, please email me at back.on.track@bell.net.
As for my layout .... I've got track and wiring to complete and only recently addressed a pressing wire shortage, which was holding up progress. Update soon.
Monday, 8 July 2013
Rolling through the diamond
 |
| Caught this train at Ostler Street crossing. It was heading southeast from the CN end of the diamond. A transfer run I'm guessing. Lots of boxcars but a few tanks, covered hoppers and some autoracks too. |
Monday, 1 July 2013
Blue sky ahead! Backdrop installed
 |
| Goodbye tool rack; hello blue backdrop. |
Layout progress is inching along. Summer is here and I've always considered model railroading more of a winter pursuit. Still, I managed to get the backdrop installed last week, so no more brick wall/tool rack backdrop.
I was worried the colour was too light but the paint store guy convinced me it would be blue enough, and I'm glad he did. In these photos it looks almost too white, but in real life, it more closely resembles sky.
Next will be to finish getting the track down and wired. I'm pondering widening the peninsula (not pictured) to make way for a larger industry. Future plans also include uploading a short video to show the trains running. Happy with the way everything is operating during the test runs so far. Really enjoying DCC.
Here's two more pics.
 |
| Here's one looking in the other direction. |
 |
| Here's one looking toward south west corner of the layout. Throttle pockets would be a good idea about now! I realize that I could have curved the hardboard here for a more eye-pleasing corner, put I found it would have made it too hard to put a building there. |
Next will be to finish getting the track down and wired. I'm pondering widening the peninsula (not pictured) to make way for a larger industry. Future plans also include uploading a short video to show the trains running. Happy with the way everything is operating during the test runs so far. Really enjoying DCC.
After that, the plan is to add the staging yard behind the workbench and fascia.
Until next time...

Thursday, 13 June 2013
CSX train derailment video....
You think your derailments are frustrating?
Derailments are a pain ... but next time you have one on your layout, watch this video and imagine how the crew of this CSX freight feels!If you're the impatient type, zip ahead to about the 3:40 mark.
Saturday, 8 June 2013
June layout update
 |
| This is the Lambton Yard area, where the railroad has expropriated a former leg of my workbench. I'm going to have to do something with that tool rack. It will give me a lot more yard space though. |
It’s been a long time since the last layout update but
despite this, I’ve managed to do a fair bit of work. Here’s a quick breakdown.
Layout extension
Hungry for more layout space, I’ve added about six feet to
the layout by placing it on top what was one leg of my L-shaped workbench. I
decided I’d be using the layout more than the workbench, plus I’ve got
sawhorses a Black and Decker Workmate and other options if I need more
workspace for projects. In order to make way for the extension, I placed some
2x4s on the former workbench, turned them on their ends and screwed them to the
plywood. Then I laid the foam over the 2x4 sleepers, glued that down and voila,
instant layout extension. The problem now is that the peg board holding the
tools will likely have to be moved to make way for a backdrop and to prevent
hammers, chisels, adjustable wrenches, etc. from raining down on my locos and
rolling stock.
Wiring
I followed NCE’s wiring recommendations: a 14-gauge buss under the layout and 18-gauge feeders to each (almost) each piece of
track. At first I used those suitcase connectors to attach the feeders to the
buss, but I found them too finicky to use. I’m pretty adept at soldering, so I
just stripped ½ of insulation off the buss, then about ¾ of insulation off the
feeder. Then I wrapped the feeder around the bare spot on the buss a few times,
soldered it and covered the connection with electrical tape. It’s hard to get a
better electrical connection than that. Over the yard, where I needed lots of
feeders in one area of the layout, I brought a feeder line from the buss to a
terminal block, then made little loops connecting the points so all screws on
the block were powered by the same circuit. Then if I needed to connect a
feeder in the area, I just ran it back to that terminal block. Cuts down on the
soldering a bit.
Many suggest running feeder to every piece of track. The thinking is that this way you’re not relying on rail joiners to carry power from one section of rail to the
other. I laid a bunch of track a long way from the nearest feeder and ran
trains, just to see if it would work (the nearest feeder was four feet and many
rail sections away) it ran no problem, I couldn’t make any of my locos stall
even at slow speeds. But I still followed best practices and added feeders to
most (though not every) piece of rail. The layout runs great, I’ve yet to have
a stall. Also I performed the “quarter test” on every track and the NCE
PowerCab short circuit detector shut down the layout each time, as it’s
supposed to do. When wiring, I always test as I go, running trains over the
spot after making every connection to ensure I’ve not wired a short,
which would become tough to pinpoint later on.
At first I had trouble, and was melting ties when attaching the
feeders to the rails but that improved when I switched to a 40-watt soldering
iron with very thin solder. I also place a piece of metal over the rails to act
as a heat sink, which helps keep the ties in a solid state.
 |
| This is the subway that goes under the tracks at Runnymede Road. |
 |
| Here's the prototype shot of the Runnymede Road subway. I still have plenty of work to do!. |
Track laying
I have great admiration for those who handlay their track,
and it’s something I may attempt one day. For now, I just want to get trains
running quickly so I’m using Atlas and Peco Code 100 track and turnouts, which
are widely available. I laid the track right on the lines sharpied onto the
foam. I found a few dabs of glue under the flextrack gives enough adhesion
while leaving open the possibility of pulling up and reusing the track down the
line. I’ve laid much of the track in the Lambton yard area and the spurs around
it. I’ve also started the extension that leads to the staging yard. I’ve not
yet laid the track around the peninsula (on the south end of the layout).
There are those who would take more time with all of these
steps while using more prototypical track, but I have very limited available modeling
time and I wanted to get trains running right away.
I’m enjoying picking up and setting off cars on my small
layout … even though the track is running over pink foam and there’s no
backdrop or buildings.
 |
| Looking from Lamton Yard over toward the West wall of the basement. |
 |
| Close up of some of my motive power, anxious to get to work! |
So what’s next:
- Finish track laying. I’ve still got to do the spurs that lead to Korex.
- Adding the backdrop. This will involve removing the tool rack. Not looking forward to that. I’m thinking of using hardboard painted a light sky blue at a height of 24 inches.
- Fascia. I love the finished look the fascia gives the layout and so I’m going to add a hardboard fascia soon.
Subscribe to:
Posts (Atom)