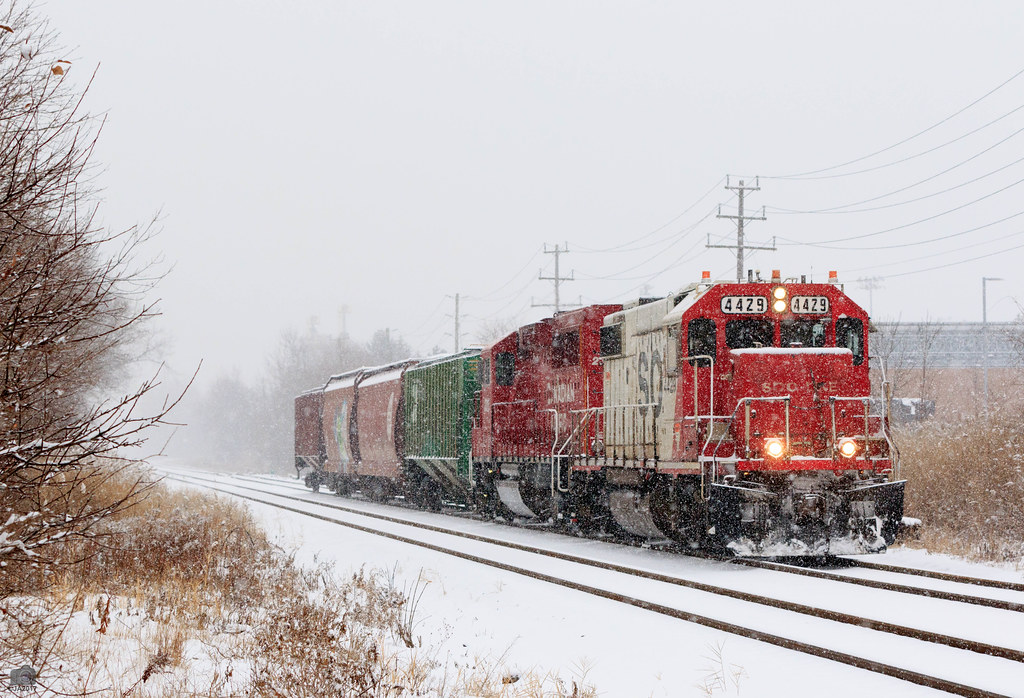
Snowy Soo

Winter Railroading.

Saturday, 8 June 2013

June layout update


This is the Lambton Yard area, where the railroad has expropriated a former leg of my workbench. I'm going to have to do something with that tool rack. It will give me a lot more yard space though. 


It’s been a long time since the last layout update but despite this, I’ve managed to do a fair bit of work. Here’s a quick breakdown.

Layout extension


Hungry for more layout space, I’ve added about six feet to the layout by placing it on top what was one leg of my L-shaped workbench. I decided I’d be using the layout more than the workbench, plus I’ve got sawhorses a Black and Decker Workmate and other options if I need more workspace for projects. In order to make way for the extension, I placed some 2x4s on the former workbench, turned them on their ends and screwed them to the plywood. Then I laid the foam over the 2x4 sleepers, glued that down and voila, instant layout extension. The problem now is that the peg board holding the tools will likely have to be moved to make way for a backdrop and to prevent hammers, chisels, adjustable wrenches, etc. from raining down on my locos and rolling stock.

Wiring


I followed NCE’s wiring recommendations: a 14-gauge buss under the layout and 18-gauge feeders to each (almost) each piece of track. At first I used those suitcase connectors to attach the feeders to the buss, but I found them too finicky to use. I’m pretty adept at soldering, so I just stripped ½ of insulation off the buss, then about ¾ of insulation off the feeder. Then I wrapped the feeder around the bare spot on the buss a few times, soldered it and covered the connection with electrical tape. It’s hard to get a better electrical connection than that. Over the yard, where I needed lots of feeders in one area of the layout, I brought a feeder line from the buss to a terminal block, then made little loops connecting the points so all screws on the block were powered by the same circuit. Then if I needed to connect a feeder in the area, I just ran it back to that terminal block. Cuts down on the soldering a bit.

Many suggest running feeder to every piece of track. The thinking is that this way you’re not relying on rail joiners to carry power from one section of rail to the other. I laid a bunch of track a long way from the nearest feeder and ran trains, just to see if it would work (the nearest feeder was four feet and many rail sections away) it ran no problem, I couldn’t make any of my locos stall even at slow speeds. But I still followed best practices and added feeders to most (though not every) piece of rail. The layout runs great, I’ve yet to have a stall. Also I performed the “quarter test” on every track and the NCE PowerCab short circuit detector shut down the layout each time, as it’s supposed to do. When wiring, I always test as I go, running trains over the spot after making every connection to ensure I’ve not wired a short, which would become tough to pinpoint later on.

At first I had trouble, and was melting ties when attaching the feeders to the rails but that improved when I switched to a 40-watt soldering iron with very thin solder. I also place a piece of metal over the rails to act as a heat sink, which helps keep the ties in a solid state.

This is the subway that goes under the tracks at Runnymede Road.

Here's the prototype shot of the Runnymede Road subway. I still have plenty of work to do!.


Track laying


I have great admiration for those who handlay their track, and it’s something I may attempt one day. For now, I just want to get trains running quickly so I’m using Atlas and Peco Code 100 track and turnouts, which are widely available. I laid the track right on the lines sharpied onto the foam. I found a few dabs of glue under the flextrack gives enough adhesion while leaving open the possibility of pulling up and reusing the track down the line. I’ve laid much of the track in the Lambton yard area and the spurs around it. I’ve also started the extension that leads to the staging yard. I’ve not yet laid the track around the peninsula (on the south end of the layout).

There are those who would take more time with all of these steps while using more prototypical track, but I have very limited available modeling time and I wanted to get trains running right away.

I’m enjoying picking up and setting off cars on my small layout … even though the track is running over pink foam and there’s no backdrop or buildings.

Looking from Lamton Yard over toward the West wall of the basement.

Close up of some of my motive power, anxious to get to work!


So what’s next:


  1. Finish track laying. I’ve still got to do the spurs that lead to Korex.
  2. Adding the backdrop. This will involve removing the tool rack. Not looking forward to that. I’m thinking of using hardboard painted a light sky blue at a height of 24 inches.
  3.  Fascia. I love the finished look the fascia gives the layout and so I’m going to add a hardboard fascia soon.

Tuesday, 16 April 2013

A great room-sized layout (and no, it's not mine)

I'm always on the lookout for websites that chronicle the construction of modern, room-sized HO-scale layouts. I'm particularly interested in diesel-era, point-to-point switching layouts and modules.

A few of the links on this blog (look to the right) will take you to some of the favourites I've found. Please feel free to email me with suggestions of other sites/blogs that fit this description and that I've not already linked to. The web is a big place!

Dan Gaken is building such a layout in his basement called the Huron & Eastern. He doesn't have one website or blog devoted to the project but has posted pictures on his flickr site (including a track plan) and what I hope will be the first of many video journals of the layout's progress on YouTube.

Here's the track plan, click on the image to make it bigger:

A very well-executed track plan! Can't wait to see his layout progress


First I'm impressed by how well his track plan looks compared to mine, which let's face it is a bit of a disaster.

I'm also struck by the inventiveness of this plan. Even though the shelves are fairly narrow, the plan doesn't look too crowded. The deep facia gives the layout a nice clean look, even though the layout is in the mid stages of construction. The aisles are also not crowded, a nice feature for visitors.

Having the ship and Saginaw river in the middle peninsula is a great design feature as well, it nicely incorporates the prototype. I also like how he included an interchange and managed to avoid a back-bending duck under.

Here's his YouTube video of Dan explaining what his layout is all about and some of the design elements he tried to fold into it:


Finally here's a link to his set of flickr pictures documenting the layout progress

Here's one of those flickr pictures but the YouTube video looks much more up to date.

New HO Layout Progress - Fascia Installation

If anyone out there sees other layouts projects like this one on the web, I'd love to see them. Send an email here or comment on this post.

I'm hoping my next post will be about progress on my layout. Thanks for reading.

Thursday, 28 March 2013

Tentative track plan!


This plan was done in PowerPoint, which caused me to struggle a bit with the line curvatures. I realize some of those turnout shapes are screwy!


Greetings, 

Posted above is a tentative track plan. I don't have PhotoShop on my new computer and the old computer has all but died, so following the lead of Don Carman of the Conral Hagerstown Division, I did the track plan in PowerPoint, which worked not too badly. 

Some notes about this track plan:

  • It isn't to scale. The proportions are approximate but I have done a test fit of the track sections on the layout itself and everything will fit roughly as shown here. 
  • I realize the geometry of the curves isn't accurate. Particularly with the turnouts. I struggled with the  curved line function in PowerPoint. For this reason consider this as a rough-in plan, or more like a schematic.  
  • It strays from the prototype. This is done for many reasons. For example, I added the fictional Monarch Auto Parts because I wanted an industry that required boxcars. The real area I'm modelling has no such industry. 
  • The three-track staging yard is removable. The three tracks will be on a cassette that sits on top of the workbench, which is four inches below the layout height. That way if I need the workbench space for one of my woodworking projects, I can detach the staging yard and move it under the workbench. It will connect to the rest of the layout with a short piece of sectional track, in the same manner that modular layout sections are connected. I may knock the yard down to two tracks if three seems to take over too much of the space. I've heard many modellers say you can never have too much staging, so that's why I went with three long tracks. They will represent locations off the layout.
  • I may still add Polytainers. CP's map of industries along the spur is here. You can see I left a few out but I may add Polytainers to the open space on the west wall. I was worried the track plan was getting too crammed. Polytainers takes covered hoppers filled with plastic pellets, as does Korex.
  • Final note. I forgot to label it as such but the area near the yard office is a greatly chopped down version of CP's Lambton Yard, which runs (roughly) between Jane Street and Keele Streets. 
Next I'm adding the backdrop and laying track. I'd love to hear your input!

Wednesday, 27 March 2013

2 Geeps working the spur


Here's a great YouTube Video of the same two GP9s I mentioned in my previous post working the spur.

They head down the spur, take the passing siding, uncouple from the cars, do an end-run around their train and push the cars down the spur.

Thanks to YouTube user gotransitf59PH for posting this.

Saturday, 23 March 2013

Two GP9s left idling on the spur


These geeps were left idling at the end of the CP's Area H industrial spur, no sign of the train crew in sight. 


This afternoon while running errands I stopped in to area H industrial spur (the spur I intend to model in west Toronto) and saw something interesting.

Sitting near the end of the spur, just past the spot where it branches off toward Korex Canada, was a pair of Canadian Pacific GP9s. They were coupled together, sitting there idling with no sign of the train crew in sight.

Here's a google map showing the spot where the locos were sitting. Except ... don't refer to the marker! It's in the wrong spot. They were sitting along the curve near Goodrich Road (just south of Titan Road) where the track curves south to east. 


View Larger Map

Now the industry Korex Canada is at the end of this spur. Two tracks of Korex’s four spur tracks appear to be holding tracks. Korex appears to be a manufacturer of some sort (packaging I think) and I believe the hoppers contain plastic pellets.

This link  contains a shot of Korex from above using Bing.com. You can see the four tracks that serve this industry. Now when I visited today, all four of Korex spurs were jammed with covered hoppers. I’m guessing the two locomotives were sitting there for the purpose of swapping empties for loaded cars as Korex goes through production. They must be busy.

Just seems strange to me that CP would keep two locos sitting at the end of a spur to shift cars around for one customer (although judging by their car turnover, they appear to be a major customer). Anyway it’s something I’ve not seen there before and so I snapped a few shots of the two locos, including the one posted above. Unfortunately I didn’t have my real camera and had to use the crappy one on my cellphone. 


If I’m in the area again this week, I’ll go back to see if the locos are still sitting there. I’d like to see them switch Korex. 


If any Canadian Pacific expert (or employee) has some insight into this, I'd love to hear it and share it. 
------------------------------------------------------------------------------------------------------------------------------
Post script: The locomotives were gone by the time I returned the next day. Maybe the train crew was just having lunch. Doesn't look like the cars at Korex have been moved.

Saturday, 23 February 2013

New lights, weathering heights (and lows)

New lights

One thing holding up progress in the layout room was the horrid lighting. It was so dark it was impossible to work. My brother in law, who is an electrician, helped me install these florescent lights and they've helped a lot. 

The new lights have made it much brighter than this pic shows. It's a big improvement.


Here's a shot looking the other way. The layout is a U-shape and the space is about 10x13. I plan to add a backdrop, which will cut the tool pegboard space in half, which is fine. Some of those tools are going to move under the layout. I can't wait to do the backdrop and fascia! 


Weathering

While waiting for my "electrician"  to come over for a visit, I tried my hand at some weathering, something I've not done before. I followed the techniques in Pelle K. Soeborg's books: Done in a Day and his new one Detailing Projects for Freight Cars & Locomotives.

Here's the cover of both books: 
If you're new to weathering, I'd recommend either of these books. 


So I weathered a handful of boxcars and two hoppers. I'm somewhat happy with the results. In general I think they are about 20% to 30% over-weathered. Despite this, they are a big improvement from what the models look like out of the box. 


This RailBox car turned out OK  but the graffiti tag got lost in the weathering. I wanted it to look more like the prototype pic posted further down this page.


I followed the steps in Pelle Soeborg's books to get the weathering effects. His models still look better than mine, probably because I over-weathered my cars by about 30%. Photographing the cars on pink insulation doesn't help!


This GB&W box probably turned out the best but again, the tag got lost in the weathering.


This one is over-weathered. Real shame here is that it was a great tag with great colours.  I've run out of decal paper but what I might to is just re-apply the tag over this one (or pull this one off first, then put the new tag on).


Here's a proto pic of a car similar to the first one I posted. Next time I will be sure to avoid over-weathering, especially on the graffiti tag!

Graffiti technique


Regarding my graffiti. I shot pics of real graffiti (or borrowed them from the Internet on free use sites) and printed them out using Testor's decal paper on an inkjet printer. The results were not bad. The Testor's decals do, however, have a tendency to fold up on themselves during the application when they're wet, more so than do commercial decals. That's why I suggest printing multiple images on every decal sheet, and at different sizes. Cram the sheet with decals! Might as well use up the space. Also don't forget to use that spray-on stuff that keeps the decal ink from running. I leaned that the hard way!

Where I goofed is in over-weathing the decals. You can't even see most of graffiti tags. 

On this one, I didn't over-weather the graffiti. I make the tags using digital photos re-sized in PhotoShop, then printed out on Testor's decal paper. 


This Evergreen box didn't turn out too badly. I left off the rust spots here because I don't want all my rolling stock to look the same. 


So here's what I've learned. 


  1. Dial back the amount of weathering by about a third when applying the wash and weathering powders.
  2. Either mask the graffiti decals during the wash or apply them after weathering the model (then lightly weather the decals). All that time spent shooting the tags, printing them out applying them, etc., was wasted here by over weathering. Too bad because some of those tags look great pre-weather. 
  3. The Testor's decal paper works ok but only use the white paper, not the clear. I used a variety pack that came with six sheets each of white and clear paper. Only the tags on the white paper worked. It takes some time to closely crop the tags in Photoshop but once you do, cropping them with the scissors is easy. 
  4. It is possible to make good quality graffiti decals using digital pictures and photo paper. Saves a lot of money (because you're not buying commercial decals). Plus you can't get more realistic than using a tag that's rolling around on a real railroad car somewhere!


Tuesday, 12 February 2013

Delays, Delays....


Like this rusty old CP caboose, my "layout" (and this blog about it) have been neglected lately.

I've not forgotten to publish, just haven't had time to work on the layout. Becoming a new father is very time-consuming!

I'm afraid the layout doesn't look much different than it does in the pictures. I've not lost interest ... I'm just having trouble finding the time between work and home commitments.

I will update with news about the track plan and work on the layout soon!