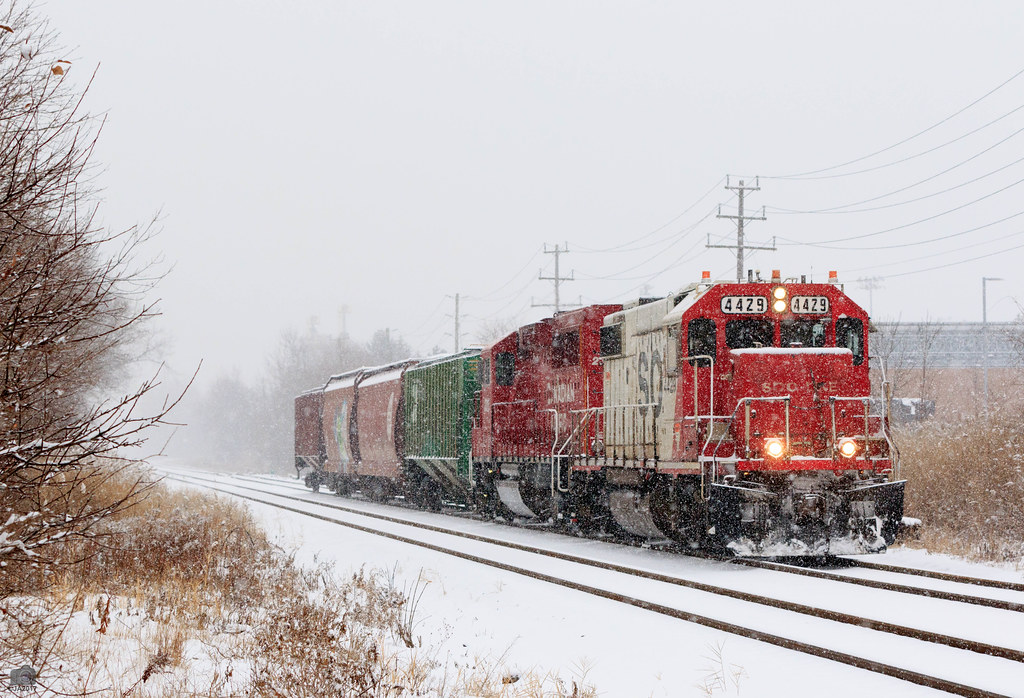
Snowy Soo

Winter Railroading.

Sunday, 23 March 2014

March Layout update


The fascia has given my in-progess layout a more finished look. The paint cost $5 from the return shelf at my local paint store.


With this winter refusing to fully retreat, I’ve managed to get quite a bit done on the layout this March. Here’s an update.

Fascia (partially) installed


Fascia installed. 

I must have read it dozens of times: layout builders impressed by what a big step forward the layout takes visually after the fascia is installed.

After humming and hawing (mostly hawing) about the depth and colour of the fascia, I let finances decide. I found a half gallon of forest green paint in the discount shelf at the local paint store and got started. As an aside, this a great money-saving tip for model railroaders: You rarely need to spend top dollar on of-the-shelf paint! Most paint stores have a shelf of paint that people have bought, taken home, decided that they hated and returned. It’s often heavily discounted (but almost never returnable). The paint I bought was a very high-quality Benjamin Moore interior latex with a flat finish. The price: $5.

Anyway the fascia was straightforward to install. I ran out of hardboard to do the peninsula, but I want to shore up the shelving under that section anyway, so it makes more sense to wait until that work is done. It does give the layout more of a finished look, less like a construction site.

Homemade throttle pockets


Now there's no excuse for leaving the throttle on the layout! Just realized the red light on the plug-in panel looks like Hal 9000 from 2001: A Space Odyssey. Should I be worried it's going to turn on me unexpectedly?

As scenery progresses, there’s less and less empty layout space to set the throttles, but it’s time I start breaking that bad habit anyway! Commercial throttle pockets are $10 a piece and Al Mayo has a YouTube video where he makes his own using 50 cent electrical boxes. Neither option appealed to me so I made my own from bits from my scrap box. They work fine and look OK. I can always replace them down the road if I want something more elegant.

Here's the throttle pocket for the NCE PowerCab.

Without the cab in it, the throttle cradle looks like a La-Z-Boy for my PowerCab.

Area – H scenery/roads started 

Roads/scenery started near Korex. With each passing week, the pink insulation board loses precious ground.


I’ve tried two ways to do the roads: drywall compound and styrene. I have to say I prefer styrene because the process is cleaner and the results are easier to control. I generally am following the road technique outlined here by Lance Mindheim: A spray with Rustoleum primer, which I will follow with an India ink wash. I’m also hitting the roads with washes of lighter greys using my airbrush so they’re not too uniform in colour. I may also try using decals of road details like manhole covers and storm grates. So far I’m happy with how the road surface looks. I’ve poured Hydrocal between the tracks at the crossings. I’ll sand it down and clean out the rail flanges with my Dremel tool and paint it.

Pond scene progress


I’ve got mixed feelings about how this scene is turning out. Here’s the steps:

  • Mark and carve out stream bed from foam layout base.
  • Cut and glue foam piece beneath layout to provide a bottom for the stream.
  • Filled stream bed with Hyrocal to seal it (this worked well).
  • Painted the stream bed black in the middle with airbrush sprays of tan at the edges to simulate depth. Here I followed the technique David Popp outlines in his book Building A Model Railroad Step by Step.
  • Poured the stream using Woodland Scenics Realistic Water.
  • Added ripple effects using Woodlanc Scenics Water Effects

So how does it look?

The water looks ok like this, when the camera lens is dropped to the layout level. Looking down from a standing position, the water looks  almost invisible. I've added ripple effects since this shot was taken.


Look at this photo and it doesn’t look too bad. It looks like water, though I wish I’d put more rocks inside the water. But standing up and looking down at it, the water is invisible. I think this is a layout height problem (in other words the layout is too low).

If I did it again I’d add more pours for greater depth and put more material inside the stream.

Runnymede Road underpass

I'm staring work now on the underpass at Runnymede, with a print out photo showing the prototype. The bridge parts will be Hydrocal castings.

I’ve pulled out the wood abutments and I’m pouring Hydrocal ones to take their place. I just can’t make the wood look like concrete! I’ve also got the styrene painted for the road surface. I will provide an update on this later!

This spur in the corner will one day serve Polytainers. For now, it serves a distributor of model railroad scenery supplies, mainly ground foam.


Wednesday, 12 February 2014

Friday, 7 February 2014

February Layout Update!


It's been a long time coming, but here's an update of the work I've been doing on the layout lately. Still lots to do, but with no end in sight to this long brutal winter, I'm going to hunker down and try to get as much done as possible in the next few weeks. 

Please feel free to comment on any of my posts.  

By turning the Walthers kit into a background building, I was able to  lengthen the structure, which extends out about only five inches from the backdrop.

Korex kitbash


Though this is a smallish layout, my hope is to keep the industries as close to prototype size as possible, even if they are just background buildings. Back in the transition era, many small industries were rail-served. These days it seems only the larger industries rely on rail deliveries, which creates a challenge if you’re trying to model the modern era on a (room-sized) HO layout.

Located at the end of CP's Area-H spur in west Toronto is Korex. It's a mid-size packaging manufacturer (I believe) that takes plastic pellet hoppers. Lots of them. The industry is served by four spur tracks and I've seen as many as eight cars there at once. There’s also a handful of storage silos both on the roof and outside the building and a truck loading area on the north side.

Here's a prototype shot of Korex. The industry is served by four spur tracks.


I looked into scratch building this industry but by the time you add up the cost of all the styrene, brick sheets, windows, etc., I decided it was cheaper and easier to kitbash it.

The kit I settled on was Walthers Paper Mill as my source of raw material. It had the right general look of a modern industry, lots of brick walls, varied roof heights and even came with some of the tanks that I’d need. The kit is supposed to be built with a square(ish) footprint with four truck loading doors and a door that can accommodate a railcar into the building. My plan was to turn this kit into a background building using the “fourth wall” pieces to extend the length of the structure. It's 35 inches long, which will give it the scale that I’m looking for.

The real Korex is served by four  spur tracks. I'm thinking mine will have two.


The build


I won’t go into a cut-by-cut description of what I did, but essentially my plan worked OK.
The Feb. 2010 issue of MR had a similar kitbash: they took a large Walthers kit and made it into a background building. In the process they created a structure that suggests a large industry typically served by today's railroads.

 
Here's how the MR project turned out. Making this a background building allowed the builder to use the "fourth wall" material to lengthen the structure. I took a similar approach with the Walthers Paper Mill Kit.
In many ways I this kitbash was inspired by an article in the February 2010 issue of Model Railroader “Build a Big Industry in a Small Space.” Here they cut up a Walthers Tri-State Power Authority kit in a similar way, making it a background building and using the “fourth wall” material to make a large background building (see pics above). The effect is that the building looks like a part of a much larger building that is typical of a modern, rail-served industry.

In the end I opted not to follow this MR scratchbuild of a modern plastics plant. See photos below of a flickr user who did. 

Another Model Railroader piece that influenced me here is a scratchbuild covered in their 1986 book HO Lineside Industries You Can Build (I'm not sure when the story first ran in MR, if ever). That build combined Pikestuff brick block units and styrene siding to build a modern plastics plant, also a very large background structure, similar to Korex. I took a long hard look at this story but decided to stick with my kitbash plan because the end result would come closer to the prototype I was modelling.


However flickr user Larry's Trains did follow the MR piece and that build looks great. See his pic above or you can click through on this link to see it.


So how did it turn out?

Um, not bad?

Some of the seams are a bit more rough than I’d like, though I’m still working on filling some of the larger gaps and putting putty and black paper behind others to make them less conspicuous. My building isn’t exactly like the prototype (click here for an aerial shot), I didn’t try to recreate every window and piece of piping, just the general look and feel.

I still have to do some light weathering on the walls, and I want to add the larger outside tanks, possibly from the Cornerstone PlasticPellet Transfer Facility kit, but essentially the structure is done.

There are plenty of nits to pick here: the brick colour isn’t really close to the prototype but I lost a key airbrush part during cleaning (it’s now on order) and I didn’t want to hold up the build while I got the new part and new paint. The weathering on the tanks didn’t turn out right and I may go back over it.

I will say that buying the Walthers kit (even though it cost  $70) was the right way to go. I’ve got loads of parts left over: wall pieces, windows, doors, roof details, etc. This material will come in handy for future builds/kitbash projects.

For my first kitbash (and second building) I’m generally happy. I’ll be less apprehensive about attempting a kitbash next time. I’ve heard many modellers say they view all kits simply as raw material for kitbashes and don’t even bother with the kit instructions. I like this approach. As I look at more and more layout photos online, I see the same kit structures popping up again and again, which isn’t the worst thing but it’s something kitbashing avoids.

Now I've just got to build the tracks down here. Otherwise, that hopper is stranded!


I’ve yet to lay track down the Korex side of the peninsula. I’m probably only going to run two tracks to serve Korex (the prototype, as mentioned, has four). But between the two tracks, the industry will be able to hold eight hoppers, so it will generate plenty of traffic.

This build has many flaws, but then when I take a close look at other layouts, including ones in modeling magazines, I see flaws there too so I’m going to move on to the next part of the layout without worrying too much about how this building fell short.  I can always come back to this building later. I'm keen to keep things moving forward.

Other layout progress

As mentioned before, I've decided to split the peninsula in half, with Korex (and possibly Battenfield Grease) on one side of the backdrop and 2 staging tracks on the other. The photo below shows the two sides. And no, I've not yet had a chance to update the track plan posted on the front page of this blog. 

So it's industries on the left, staging on the right. And yes, I will extend the layout edge on the right to prevent cars tumbling to the concrete floor below.

With this plan, there were now be staging on both ends of the layout. This way trains can move though, exchanging cars at Lambton Yard before continuing their trip "off layout." From there a switcher can work the industries. 

Still lots to do here, but the stream is taking shape.

Adding a river (well, a stream really)

One layout design element Lance Mindheim suggests is having a scenery-only area in the middle of your switching  layout to enhance the feeling that  trains are moving from one place to another. 

My scenery area is at the base of the inverted "U," where you see the partially sceniced slope. I wanted to add a small stream here and I've read a million articles about how to do this. Right now I'm wrestling with paint colours, trying to get the black in the middle to simulate depth, with a brown (or tan) along the water's edge. This remains a work in progress. So far I've not been able to create the "feathering" effect, but I've yet to try it with my airbrush (which, as mentioned above, is awaiting a part delivery). 

Right now I feel the edge colour is too "reddish" I'd like it more tan and feathered better into the black before I pour the water. 

The stone bridge I made using Hydrocal and a casting I built. It's not perfect and I've fiddled around with a few different pours and colours and I think I'm going to use casting you see in the photo. Making plaster castings for bridges, retaining walls, etc is quite fun. I think I've leaned a few tricks that will ensure I make a better mould next time.

Check out this guy's website for some great tips about using plaster moldings in modelling (he also has a casting service if you want something made).

So that's it for now. I'll be working on tracklaying the Korex spur this weekend and fiddling with the river scene. Your comments are always welcome. 

Also, I love linking to blogs/websites of other layouts that feature modern, room-sized switching layouts. If you see one that isn't already in my link list, please let me know about it by commenting on my page.

I wil leave you with a picture that illustrates what happens when a full bottle of plastic welder is dumped, by accident, on the surface of a foam-based layout. My advice: stand back and don't breathe in.

Here's were I spilled a full bottle of plastic weld on the layout. Went right though the foam of course. Perhaps this will be the future location of an HO-scale illegal toxic waste site.  


Happy modelling.


Wednesday, 5 February 2014

Another cool Area-H pic


It's great that you can now share images easier on flickr. Here's a shot of CP switching Area H.

Extensive layout update is in the works.

Thursday, 30 January 2014

Lambton lash-up

Some Geeps waiting to roll out at Lambton Yard.
Here's a shot of some Geeps I shot from the Rona Parking lot.

Great Photo album of Area H


I'm still working on the layout update, but just to let everyone know I'm alive and working on the project, I offer this link to an excellent album of images of the Area H industrial spur posted on railpictures.net.

CP never seems to be working the spur when I roll by, but the site has great pics.

Unfortunately there doesn't seem to be any easy way to embed/share their images. So the best I can offer is this url link to the album.


Tuesday, 26 November 2013

(Mini) layout update

Some progress to report


Greetings, the snow is starting to fall so it's officially model railroad season. I've managed to make some small progress on my layout in the past few weeks. Here's a summary.

Tweaking the track plan

I felt the layout would operate better if there was some "off layout" staging on the peninsula. That way a train could start on the workbench (east) staging move through the layout and exchange cars, then head to the staging track on the peninsula (west staging). I have more rolling stock than can operate on the layout at once (anyone else?) so I want to put a drawer under the layout beneath the staging tracks so cars can come on and off the layout. 

The trackplan on the home page does not yet reflect these changes, but what I also wanted to do was divide the peninsula with a view block, separating Korex from a two-track staging yard. But to do this I really needed to lengthen and widen the end of the peninsula. Which brings me to the point below: 

Move to extend, widen the peninsula

The move to extend and widen the peninsula took some re-jigging of the benchwork.  But I had the space in the aisle, so I figured I should take it. The staging tracks will be on the right. There will be a scene divider (backdrop) about six inches in from that right edge. Korex will go on the other side. 
Here it is with the foam added. 
I decided that the original peninsula width (21 inches) was too narrow to accomplish what I wanted. So I extended it two feet in length and widened it about eight inches at the end and tapered that back to the 21 inches. About six inches of the peninsula will be a two-track staging yard and Korex will be on the other side of the scene divider. 

I want to try and model Korex true to its size, but as a background building. The prototype has four siding tracks and at any given time there can be up to a dozen hoppers at this industry, including the off spots. I may have to crunch that down a bit, but I don't like having all small industries, even on a small layout. Here's an aerial shot of Korex:

This is an aerial of Korex from the west. You can see it's a large industry that takes plenty of plastic pellet hoppers. 


Here's a shot from the ground level where the tracks diverge:

This is Korex from ground level. This is where the tracks diverge: off-spots on the left, unloading tracks on the right. The fact that it's a big, busy customer makes modelling this industry appealing to me. 

Adding a hill to the "back turn"

The hill begins to take shape. I'm considering adding a drainage ditch between the track and facia you see at the left. 


While I was waiting to get some lumber to re-jig the peninsula, I decided to fill the area between the back turn of the "U" and the backdrop. I used left-over foam insulation and covered it with Sculptamold. 

This is the start of the hill. The south wall is to the left, the west wall is straight ahead. 


This is the first time I've done any scenery but I'm fairly happy with how it turned out. I found the Sculptamold a bit dry at the suggested mixing instructions, so I added more water. Upside: it spread more smoothly. Downside: it took forever to dry. Next time I'll stick to instructions. I think it's supposed to be that dry.

This is the hill after the Sculptamold was applied. The camera light meter wasn't set right here so it's hard to see the detail in the white Sculptamold here. 


I worked left to right and the first effort was much lumpier than where I finished up on the right side. Next step is to cover it with some tan latex paint and ground turf, foam, etc. I'd like to add a shallow drainage ditch between the track and facia in this area. 

What's next?


Here's a brief list of what I hope to accomplish in the next few weeks.

  • Build the scenic divider for the peninsula.
  • Figure out where the buildings and road will go on the left (non staging) side of the peninsula. 
  • lay track on the peninsula, wire and test it. This will mean the entire layout (aside from the east staging) is operation.
  • Cut and contour the shape of the drainage ditch.
  • Get the facia attached to the layout. 
  • I may also paint the foam all over the layout, with plans to scenic it later. The pink is driving me nuts!
I love to get comments. Come back for future posts, in which i will introduce the layout's motive power.  

Happy modelling.