Snowy Soo
Saturday, 2 December 2017

Tuesday, 3 October 2017
Sunday, 26 March 2017
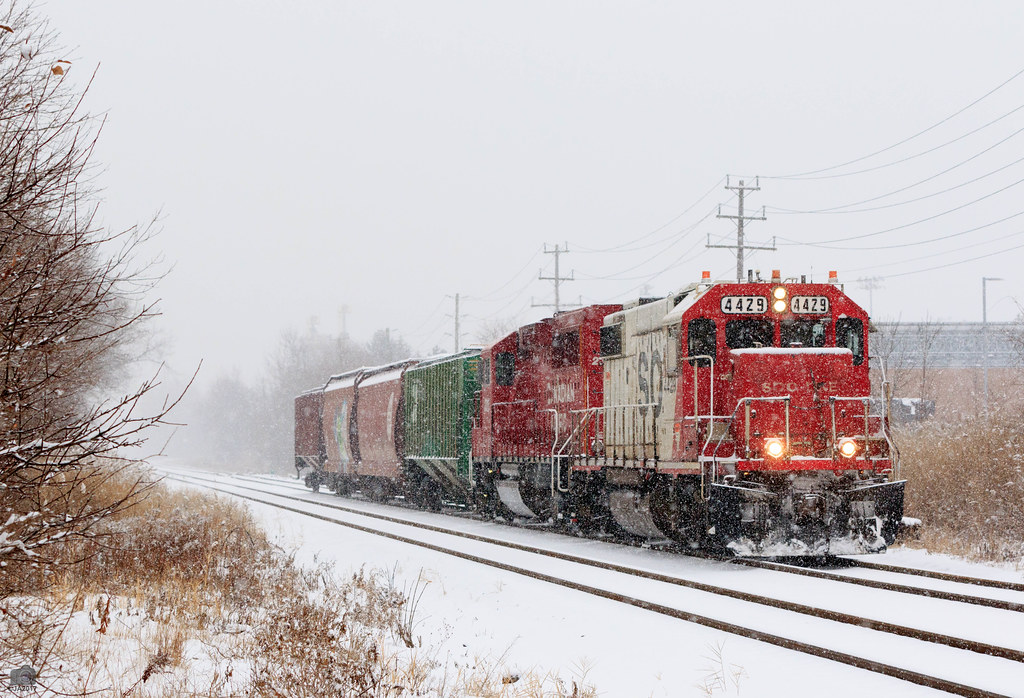
CP en route to Versapet
Caught this short train on the Obico sub on its way to switch out hoppers at Versa pet (makers of kitty litter apparently).
Friday, 11 November 2016
Cool video/layout: Port of Los Angeles in HO scale
I won't bother with a long description here, instead I'll let this great video speak for itself.
I'm adding it as a link to my list of favourite modern, room-sized layouts (listed down the right side of my blog landing page).
Enjoy
I'm adding it as a link to my list of favourite modern, room-sized layouts (listed down the right side of my blog landing page).
Enjoy
Saturday, 24 September 2016
Playing around with container images

Greetings everyone,
They say slow progress is better than no progress, so I'll take some heart in that.
I am getting some modelling done this weekend, focusing on what I see as the two most urgent and glaring problems my layout has right now:
- Too much bare blue-sky backdrop badly in need of photographic images to give the layout some depth.
- Still too much pink insulation board showing. I mean ... it's been three years. You'd think by now I would have put some paint and ground cover over the bare spots (and yet they're still there).
I decided to do something with what looks like a vacant lot between two industries: the warehouse (which I think I'm going to call Queensway Transfer), and Hymopak.
Here's the spot on the layout, empty and adorned by only my four pathetic shipping containers:
 |
| Those four containers look lonely against the backdrop. But at $10 a piece now, filling the space with more would cost more then I'm willing to pay. |
On the prototype, across Medulla Road from Hymopak, there's a large industry that sells, rents and fixes shipping containers. I'm guessing the business is there due to its proximity to Obico container terminal, which CP shuttered a few years ago.
 |
| This shot shows the industry I'm modelling. I like the multi-coloured stacks of shipping containers. |
Now, I could just model it using HO scale plastic shipping containers, but they're surprisingly expensive. Even when bought in packs, they're in the range of $40 for three, which seems like a lot. I mean, they're just plastic boxes!
I've managed to pick up a few cheap containers (four in total) at train hows. But it's not enough to create the kind of mass I need for this spot. So, I decided to try something that's quick and almost free: printing digital photos of real containers, printing them out to size and combining them to form a background image.
There was an article about this in one of my older Model Railroader magazines that I now can't locate.
One challenge is that I no longer have layout programs or Photoshop on my computer. Those are expensive too (I know what you're thinking and you're right, I am cheap). I know they're are free photo editing and layout programs out there, but I wanted to know if I could get useable images uploading photo files and placing them in a Google doc (simple).
So I went to work this morning. The hardest part was finding images of containers shot directly from the side, and not off on an angle. I uploaded them onto the Google doc, moved and cropped the rectangular container images until they looked like stacks and printed them out on photo paper.
You can see the results here. Sorry this pic is so blurry.
 |
| Camera shake made this photo come out blurry. Images of the actual containers are fairly sharp. |
You can see the results here:
 |
| The images don't look bad. But I think the effect would be much better in 3D, which will be more work. |
 |
| Here's a wider view. |
Well, I'm glad I to know I can use Google Docs to contain the images for printing. Though its function is very limited for layout tasks, I was able to crop and stack the containers. This is a good thing to know.
I'm happy with the image quality but I'm convinced the containers need to be "built out" and made 3D, not pressed flat against the backdrop. I think I'm going to go back and do this here, but it's going to be more work. I could photo laminate the images onto a wood or styrene blocks. Then of course, I would need shots of a few container ends, which means another hunting expedition on Google images.
I still think that for now, the containers add a bit of visual interest to what was a barren section of the layout. This is going to be one of those situations where it will have to be "good enough for now" until I can circle back and maybe improve the scene when I have more time.
A chain link fence, maybe a small utility building and some scenery to blend the images in would help the scene out a lot.
I once saw at a train show very cool N scale module of a large shipping container facility. The man who build it combined dozens of images like the ones below to create a convincing scene along the backdrop. He also had scores of actual shipping container models stacked between the loading tracks, which really helped give the scene the scale it needed.
I'd be interested to hear your comments.
Also, if anyone out there is interested in trying something like this on their layout, I've included some downloadable image files below. You will need to re-size them. I'm no expert in posting downloads.


I once saw at a train show very cool N scale module of a large shipping container facility. The man who build it combined dozens of images like the ones below to create a convincing scene along the backdrop. He also had scores of actual shipping container models stacked between the loading tracks, which really helped give the scene the scale it needed.
Also, if anyone out there is interested in trying something like this on their layout, I've included some downloadable image files below. You will need to re-size them. I'm no expert in posting downloads.


Thursday, 28 July 2016
Very cool: Lego gears for a modern roll-up door
No, I've not died or given up the hobby.
With a full-time job and two young children, my modelling comes in fits and starts ... with long gaps in between, which is fine.
I have been working on the layout and plan to post an update this weekend. In the meantime, I thought I'd share this cool idea I spotted on Thomas Klimoski's excellent Georgia Northeastern layout.
On his layout, there's a modern building with a roll-up door that allows freight cars to be delivered inside. The difference is, he's got a door you can roll up by twisting a knob disguised as a roofing vent.
Best of all: it uses gears from a Lego Techniques set to drive the door mechanism. Very clever. A Model Railroader how-to article waiting to be written.
Check it out:
Thomas's layout is my favourite kind to check out: a room-sided modern-era layout that features industrial switching.
Here's an embed of a video tour of his layout.
Enjoy this and be sure to check out the rest of his videos.
With a full-time job and two young children, my modelling comes in fits and starts ... with long gaps in between, which is fine.
I have been working on the layout and plan to post an update this weekend. In the meantime, I thought I'd share this cool idea I spotted on Thomas Klimoski's excellent Georgia Northeastern layout.
On his layout, there's a modern building with a roll-up door that allows freight cars to be delivered inside. The difference is, he's got a door you can roll up by twisting a knob disguised as a roofing vent.
Best of all: it uses gears from a Lego Techniques set to drive the door mechanism. Very clever. A Model Railroader how-to article waiting to be written.
Check it out:
Thomas's layout is my favourite kind to check out: a room-sided modern-era layout that features industrial switching.
Here's an embed of a video tour of his layout.
Enjoy this and be sure to check out the rest of his videos.
Friday, 26 February 2016
If you're needing inspiration....
The layout featured in the YouTube embed above is Per Laursen's amazing "UP/BNSF in Texas layout."
This is a complete video overview of his layout, but he's also posted some more video embeds, photos and general information about the railroad on his website here. The track plan is here.
He also runs his own company supplying modern model railroad structures. If you need a Denny's or Lowe's store on your layout, Per just might be your guy. The website for his company Summit Customcuts is here.
With its modern equipment and simple track plan, Laursen's modelling reminds me right away of Pelle Soeborg, a contributing editor of Model Railroader whose well-known work you can see here. Apparently, these two Danes are friends.
His layout is 44'x28' with loads of staging, cameras to monitor the hidden tracks, automated electronics, etc., etc. The layout presentation is also exceptional (lighting, backdrop, panels ... all first rate)
Many modellers would run into some serious limitations trying to create a layout like this: space, time, money, skill ... or in my case, all four.
And though I'll certainly never build a layout like this I find it a source of inspiration to look at layouts of this quality.
 |
| Modern buildings and outstanding layout presentation are hallmarks of Per Laursen's modern-day layout set in Texas. (Photo: Per Laursen/www.summit-customcuts.com) |
Monday, 8 February 2016
Want to save your modelling dollars? Buy Canadian
 |
| Those gold coins don't hold chocolates. They are Loonies, each worth one Canadian dollar or, as of January 2016, about 72 cents U.S. |
The Internet is full of good-sense tips to help modellers save a few bucks. There are, for example, YouTube videos about building static grass applicators from battery-powered fly zappers, tips about using craft paint instead of the stuff on hobby shop shelves, there's even a YouTube channel called The Frugal Modeller devoted almost entirely to helping modellers stretch the old layout-building budget.
For example in the Frugal Modeller episode embedded above (URL is here), he tells of using old loading pallets to build benchwork for his N-scale layout.
Now scouring through construction sites and back alleys in an effort to find warped, wet, splinter-ridden wood shot through with 800 nails is not everyone's cup of tea, but you have to praise his ingenuity.
Or maybe I just like his channel because he's a Canadian who models CP. The point is, money saved on lumber (or anything else) is cash you could better spend on custom locos or a DCC system.
I'd like to offer another another money-saving modelling tip, this one directed at my many friends and followers who reside in the United States.
The top-secret tip? Buy Canadian.
Though it's big news up here, my American neighbours may not know the Canadian dollar is trading particularly poorly against the U.S. dollar right now. To get specific, a U.S. dollar is worth about $1.40 Canadian at current exchange rates.

Expressed another way, U.S. shoppers get a 40 per cent discount when they buy Canadian, though that's before they pay shipping, taxes and duty. But even with that factored in, there are bargains to be had up here. It's at least worth a look.
Now I'm a regular troller for deals on eBay but lately I only search Canadian sellers because the current exchange rate punishes me so severely. But what hinders me, can help my U.S. friends.
I'm not suggesting my American friends and relatives (and I have many) stop buying in the USA, but before making your next MR purchase, why not run the numbers and check prices on the sites of a few Canadian retailers?
I've ordered model railroad goods -- everything from my DCC system to structures and locomotives -- from the following three retailers and have found them all to be top-rate vendors:
- Credit Valley Railway - A massive hobby store located in Mississauga (just west of Toronto). This place is 100 per cent devoted to model railroading and they have excellent customer service. If you're ever in the Toronto area, drop in (they have a great in-store HO-scale layout) but if you can't make it here and you live in the U.S., check them out, remembering all the while that one of your dollars is worth $1.40 to them.
- Otter Valley Railway - Another excellent retailer I can recommend with a very good online store. They're located in Aylmer, Ontario. I'd explain where that is but why bother? You're going to order from the comfort of your home in Wichita or wherever. Check out their site and knock 40 per cent off every price you see. (Note: 40 per cent discount does not apply to Canadians; try not to take it personally.)
- Canadian Express Line - A smaller operation but one I've used with great satisfaction. I purchased my NCE PowerCab there. Again, a reminder, prices are in (cheap) Canadian dollars.
Other Canadian retailers I've not used but with excellent reputations are Rapido Trains, Fast Tracks (they make supplies for hand-laying track) and Pacific Western Rail Systems out in Vancouver.
There are other retailers I could mention in this post but I'm holding back until they agree to accept my Canadian dollars on par with the U.S. Greenback for my next purchase. I issued that request a while ago and am still awaiting their reply.
Also, I am accepting commission cheques (or MR supplies) from Canadian model railroading retailers who've sold goods to U.S. customers who've read this blog post.
Also, I am accepting commission cheques (or MR supplies) from Canadian model railroading retailers who've sold goods to U.S. customers who've read this blog post.
And as good as this potentially is for U.S. residents who suffer from model train addiction, you can consider this a limited time offer. Note that the exchange rates between our respective currencies does bounce around. As recently as spring 2013 our dollar traded at par with the U.S. dollar.
So as they say in the ads for Shamwow and Flex Seal, act now.
So as they say in the ads for Shamwow and Flex Seal, act now.
Sunday, 7 February 2016
February update
 |
| A ground-level view of Hympoak, a new industry on my layout. The prototype takes deliveries of plastic pellets in hoppers and produces plastic merchandise shopping bags. |
Greetings everyone,
I'll start with a tip: a full time job and two kids under four years old really cuts into your modelling time! This explains the long absence from posting anything other than prototype photos of Area H for the past few months.
I have made slow progress sorting out all sorts of little things on the layout. Here's what I've been working on
Hymopak
In this post, I shared research and photos about Hympopak, an industry I wanted to model. It takes rail deliveries of plastic pellet hoppers and turns them into shopping bags, like the kind you get at Home Depot and other large retail stores.
The build
When I kitbashed Korex -- another plastic pellet factory on my layout (see here) -- I had trouble keeping the styrene roof and walls from bowing. For this background building flat I wanted to use a more solid base so I wouldn't have this problem again. I built the base of the building out of scrap plywood then laminated styrene sheets to that. This seemed to work well as it kept the long walls arrow straight. The building is long, about 40 inches, so any bowing would really show up and spoil the effect.
I used some scrap MDF for the roof of the building. I set the roof slightly below the edge of the wall to create a little "lip" above the roof.
 |
| This is the wood base I used as the structure for the building. The walls are plywood, the roof is two pieces of MDF. |
 |
| The worst part of the build was cutting the openings for the windows. |
I used brick styrene sheets for the walls, a strip of regular styrene painted a concrete colour for the foundation and corrugated styrene painted black for the cladding at the top. I used doors and windows from other kits for the window and door openings.
Here's what the finished building looks like in place on the layout.
 |
| Here's an overall shot of Hymopak. The team track spur is in the foreground. |
 |
| Here's a track-level shot. I built the small loading dock out of styrene. The doors, windows and hand railings were left over from the Paper Mill kit, which was kit bashed into Korex. |
 |
| The spur can hold three plastic-pellet hoppers. |
 |
| Here are the storage silos, made from the Walthers plastic pellet silos kit. I made the sign with a photo I took of the prototype ... then printed it out on decal paper and stuck it to the silos. The building and silos still need weathering. |
 |
| Another track-level shot. The vertical piping was made from sprues from a kit. They add some detail but here's a secret: they're really there to hide the seams between the brick sheets! |
Now I realize that building doesn't capture many of the details and dimensions of the prototype. The real Hymopak is taller, less of a pure rectangle, has more details, nooks and crannies. I just don't have time to create a model that is that detailed. Because I'm always pressed for modelling time, I have to take a bit of a 'good enough' approach and move on to the next thing. I can always replace it with a more detailed building down the road but for now, there are just too many bare spots on my layout to linger too long on any one industry.
Despite this, I still plan to:
- Weather the building and silos.
- Enhance the windows, possibly using photos of real factory windows.
- Ballast and weather the track (I need to cover that white styrene ramp below the track).
- Add some safety signs, boxes, maybe a forklift, figures, etc. to add "life" to the structure and make it look busy. It's funny how just placing the truck near the building for these photos helped improve the look.
For now, I'm pretty happy with how it turned out.
Plastics industry: a great addition to any modern layout
I would encourage anyone with a modern layout to consider a plastics facility like this.
I was interested to see that just today, John Longhurst, who writes the excellent CP Rail & Minnesota Subdivision blog, wrote about a somewhat similar industry in Mississauga (which is just west of Toronto). The industry is called Katoen Natie and it also takes plastic hoppers. You can read John's post about it here.
I've visited this industry myself. Often there is a large boxcar spotted on the spur among the covered hoppers (though there wasn't one there the day John visited).
Modelling this industry (or one like it) would require a similar, simple approach. A building flat (though of steel walls, not brick) and a few storage tanks and you're essentially done.
I now have two plastics facilities on my layout (Korex and Hymopak) and I could have had three. On the Area H spur there's also Polytainers, which takes pellet hoppers and turns them into plastic containers, like the kind that ice cream and yogurt comes in. Again, modelling that would be as simple as a brick building flat with some silos, like the kind in the Walthers Plastic Pellet hoppers kit. I've never seen this industry without two hoppers on its spur.
Some may say these simple industries are not as "eye-catching" as a sawmill, oil refinery or coal mine. Maybe not. But to me they say "modern suburban industry" which is what my layout models.
Other layout additions
Rocking the hill
 |
| I added puffball trees and some rock castings to the area near the creek. I didn't like the look of the rolling hill so I cut out some of the foam and added the castings and foliage. |
I've managed to squeeze in a few other additions. Here I've added a rock face behind the creek. Though there isn't a prototype for this on the area I model, I wanted to try out making and painting plaster rocks. I think they turned out OK. I also added some puffball trees to the top of the hill (and still have to add more).
Before I added the rocks, the hill just seemed too bland. I think this adds some much-needed visual interest. I plan on adding a photo backdrop with a skyline here to enhance the scene's depth.
 |
| GMTX 125 is now in service. Adding all the little detailed parts nearly killed me. I don't think this is the kind of modelling I'm best at (or enjoy most). |
GMTX 125
For reasons I can't explain, I wanted a leased locomotive on my layout. GATX 102 started life as an undecorated Athearn SW1500. I painted it, added decals and details. I honestly struggled with getting some of the details on this model. Some did not survive my hammer hands. I may go back and fix these problems later. I'm not sure I would attempt a project like this again. The upside is the loco doesn't look too bad and is a good runner. It was DCC ready so I just had to lift the shell, pull out the jumper and plug in a Digitrax decoder. The ease of this has convinced me that I'm only buying DCC-ready locos from now on!
 |
| Here's a prototype shot I was working from. Another problem? I didn't get the colour close to correct. |
That's it for now. As always I welcome your comments.
Thursday, 24 September 2015
I'm back ... and great layout visit piece in MRH
I think I may have mentioned in a previous post that model railroading is largely a seasonal hobby for me, a good way to pass those long winter nights. That's why I've been silent this summer.
However with the cooler weather now on its way, I'm getting some work done on the layout and a few projects going on the workbench. I will be posting about them here in the next few weeks.
In the meantime I'd light to point to a great layout visit story in Model Railroad Hobbyist, a free online magazine about this great hobby.
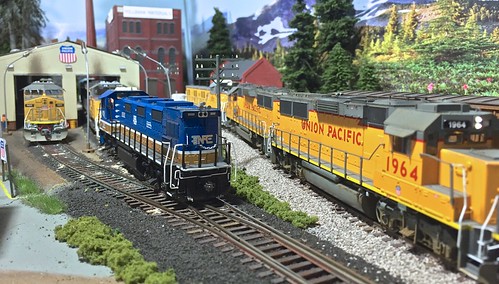
In an article you can read here, the magazine profiled Shaun Toman's HO scale Union Pacific Oregon Division. The layout itself is excellent. I was intrigued to read about this room-sized (10' x12') layout that models the modern era. Toman faced challenges squeezing it in, but he's managed to produce a nice-looking layout in not a massive space that's able to have large, modern diesels and longer rolling stock like auto-racks.
Using great backdrops and scenery, he was able to include some industries, stretches of mainline run and even a small yard and engine shop.
I found it interesting that he built his layout in a shed separate from his house. Of course, that's easier to do in Oregon's temperate climate than most other places in North America! Still, I think it proves you may not need a basement to have a layout.
I must tip my hat to MHR here as well. The Q & A style article was very thorough, and it answered every question I had about the layout. The photos are excellent and it was nice to see a track plan in there.
I found it interesting that like me, Toman regrets not building his layout higher off the ground.
I'm always on the lookout for room-sized layouts that depict the modern era. If you see a good website or blog about such a layout, please put a link in my comments and I will put it in the links on the right side of this blog.
So to read more about Toman's layout, check it out on MRH here.
Also, Toman has a great flickr page with an album that has more than 300 photos of his layout. I've embedded a few below to offer a taste of his work:
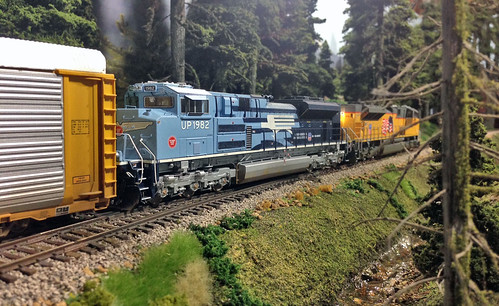
Large, modern diesels and auto-racks ... must be a massive basement or club layout, right? No it's 10' x 12'.
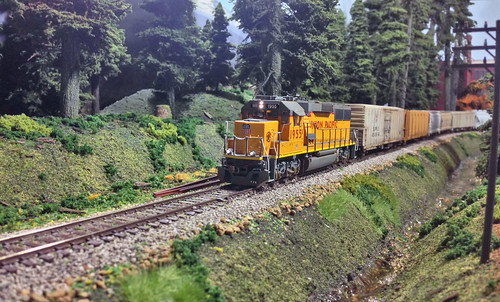
Some nice mainline runs give the trains a bit of space.
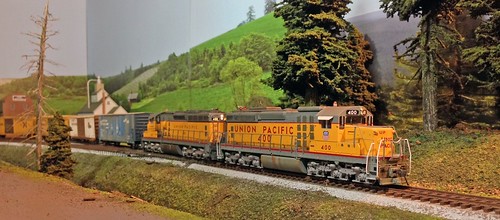
Effective photo backdrops like this make a small layout seem much bigger.
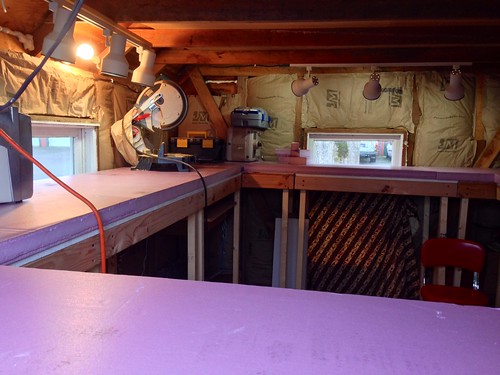
Here's what the space looked like before the track was put down. He built the layout in a shed separate from the house.
Friday, 24 April 2015
YouTuber NS Train fan is selling his layout
Greetings,
Almost exactly a year ago, I wrote a post about 5 MR YouTubers I liked.
To this date it remains one of this blog's most viewed posts (List stories, known as listicles, have become a staple of online journalism because the restive online audience just can't seem to resist them).
Anyway on my top 5 list was YouTuber NS Train fan (Ben Earp). I recommended Ben's channel to other modellers because he produced a lot of great how-to videos that chronicled his construction of an N-scale layout based on the Salt Lake Route track plan which was published in Model Railroader a while ago.
I've always liked this track plan for a compact N-scale display layout with a lot of operating potential, even though I model HO.
In addition to building his layout, Ben did a number of excellent videos about layout visits, trips to train shows, etc.
His videos were set apart by their high production quality, and his happy, humble approach.
But I knew something was up when last year, after months of weekly posts, his videos stopped appearing. The video silence was sudden and without explanation. Until yesterday.
In a video embedded below, Ben reports with some sadness that he's selling his layout, but not getting out of the hobby. He says he needs the money for college, something this one-time broke student understands.
His price is $500, which includes the track, some buildings and a Digitrax Zephyr system (locos and rolling stock not included). Not a bad price when you consider that the Kato Unitrack is probably worth a few hundred alone. The 4x9 foot layout is at the start of the scenery stage and fully operational. I believe Ben lives in North Carolina.
This layout would be a good buy for someone in that area looking to get into the hobby. It might appeal to someone keen to get a running layout right away, maybe someone who wants to get into the hobby but who doesn't have the skills or tools needed to build benchwork.
Ben won't ship the layout though; he's asking the buyer to come to him and pick it up.
Ben says he plans to build another layout in the future. Here's hoping that he will not only do this, but will also chronicle it with another great series of YouTube Videos.
In the meantime, Ben's past videos remain on his channel for everyone to enjoy.
Thanks Ben and good luck.
Almost exactly a year ago, I wrote a post about 5 MR YouTubers I liked.
To this date it remains one of this blog's most viewed posts (List stories, known as listicles, have become a staple of online journalism because the restive online audience just can't seem to resist them).
Anyway on my top 5 list was YouTuber NS Train fan (Ben Earp). I recommended Ben's channel to other modellers because he produced a lot of great how-to videos that chronicled his construction of an N-scale layout based on the Salt Lake Route track plan which was published in Model Railroader a while ago.
I've always liked this track plan for a compact N-scale display layout with a lot of operating potential, even though I model HO.
His videos were set apart by their high production quality, and his happy, humble approach.
But I knew something was up when last year, after months of weekly posts, his videos stopped appearing. The video silence was sudden and without explanation. Until yesterday.
In a video embedded below, Ben reports with some sadness that he's selling his layout, but not getting out of the hobby. He says he needs the money for college, something this one-time broke student understands.
His price is $500, which includes the track, some buildings and a Digitrax Zephyr system (locos and rolling stock not included). Not a bad price when you consider that the Kato Unitrack is probably worth a few hundred alone. The 4x9 foot layout is at the start of the scenery stage and fully operational. I believe Ben lives in North Carolina.
This layout would be a good buy for someone in that area looking to get into the hobby. It might appeal to someone keen to get a running layout right away, maybe someone who wants to get into the hobby but who doesn't have the skills or tools needed to build benchwork.
Ben won't ship the layout though; he's asking the buyer to come to him and pick it up.
Ben says he plans to build another layout in the future. Here's hoping that he will not only do this, but will also chronicle it with another great series of YouTube Videos.
In the meantime, Ben's past videos remain on his channel for everyone to enjoy.
Thanks Ben and good luck.
Friday, 17 April 2015
Great video: Area H spur being worked
Here's a great YouTube video showing the top end of Area H spur being worked by CP crew:
The YouTuber here is CitySlicker.
He shoots a lot of great Toronto-area railroad videos. He also has a very good flickr site.
Chances are if there's a strong photo at the top of my blog showing Area H or Canpa switching, it's a photo link to his flickr!
I realize there's been more prototype material than model material here lately.
I've haven't been able to get to the layout. Progress there has very much been slow motion I'm afraid.
I've not given up on the project however. I'm hoping to post part II of the Hymopak structure build soon.
In the meantime, enjoy this video.
As always, I welcome your comments.
The YouTuber here is CitySlicker.
He shoots a lot of great Toronto-area railroad videos. He also has a very good flickr site.
Chances are if there's a strong photo at the top of my blog showing Area H or Canpa switching, it's a photo link to his flickr!
I realize there's been more prototype material than model material here lately.
I've haven't been able to get to the layout. Progress there has very much been slow motion I'm afraid.
I've not given up on the project however. I'm hoping to post part II of the Hymopak structure build soon.
In the meantime, enjoy this video.
As always, I welcome your comments.
Sunday, 22 March 2015
Building Hymopack (Part 1.)
 |
| The lawn sign of Hymopack, an industry that manufactures plastic merchandise bags and will soon be represented on the West Toronto Junction. |
The Prototype
In an earlier post, I'd mentioned the process of modelling Korex, a large industry that takes rail deliveries of plastic pellets in covered hoppers. The industry I'm modelling now, Hymopack, also takes plastic pellet hoppers. Located on Medulla Avenue in Etobicoke, Hymopack makes merchandise bags for retail stores. According to their website, the company's clients include Home Depot, and other retail stores such as Canadian Tire and The Beer Store.Interestingly, there's another rail-served plastics plant on the main spur I model: Polytainers. There they turn plastic pellets into containers you find at the grocery store, the kind that hold everything from Hummus to ice cream. I'm not modelling Polytainers but it's interesting that three rail-served plastics facilities are located fairly close together in one area of Etobicoke (West Toronto).
The Building
 |
| This is the exterior of Hymopak. It's the brown brick building on the left with metal cladding. You can see the tops of the white tanks above the yellow brick building on the right. |
Hymopack operates out of a brick building with metal cladding, typical of modern industries. The spur that serves the building descends southward from the CP east-west mainline and curves west into the back of the building. The hoppers are unloaded into a series of at least 10 large storage tanks. The tanks are placed well back of the street.
You can see the aerial view below. Medulla Ave. is visible at the left:
 |
| An aerial view of the industry. The road is at the left, the industry stretches a few hundred meters away from the road. You can see a cut of four covered hoppers used to deliver plastic pellets on the spur. There is no way to get near the spur track without trespassing, so I have to rely on this Bing maps image and what I can see from the road, which is more than enough. |
Obviously this industry is too big to model to scale. When I'm aiming for here is something that captures the look and feel of this industry. At a train show recently I picked up a preowned (but still unbuilt) Walthers Plastic Pellet Transfer kit.
Here's what image from the kit's box:
 |
| Tanks from this Walthers Plastic Pellet Transfer kit look almost identical to the ones in use at the industry I'm modelling. |
 |
| Here's a shot of the top of the tanks at Hymopack. This is as close as I could get to the tanks without trespassing! |
This kit features four silos almost identical to the ones in use at Hymopack. They are white, appear to have a similar proportions, are connected by overhead walkways and have cage ladders for access.
My plan is to combine these four silos with a brick building flat set against the backdrop. The spur that will serve this industry is located in the southwest corner of my basement. Now I realize that I'll have far fewer tanks thank the prototype industry. For anyone planning to play 'spot the differences" I'll just say that I'm trying to capture the general "look and feel" of the prototype, not build a flawless scale replica of it. If I ever come across a second Plastic Pellet Transfer kit maybe I'll add more tanks. Foor now, I'll just stick to an array of four tanks.
 |
| I like how the company logo appears on the two tanks closest to Medulla Ave. The logos are positioned at different viewing angles. I'm going to try to recreate that using an image of the logo from either the Internet or the lawn sign picture. |
One interesting thing about the Hymopack tanks is that the two closest to the road have the company's logo painted on them. I plan to do the same on the model.
More on that process in the next post. I will also show how I'm scratch-building the structure itself.
Saturday, 7 February 2015
Cool video of the SoundTraxx Soundcar
No time for a layout update this weekend, but here's a cool video demonstrating the SoundTraxx SoundCar decoder.
From this video, it looks like a few of these would add a lot of atmosphere to any layout. I really like the flange squeal sound.
Thanks to YouTuber TManN for posting this video.
Thursday, 29 January 2015
CP plays host to 7-year-old Toronto railfan and blogger
 |
| Railfan and blogger Nathan O'Neill, 7, meets with a CP crew member. The railway has regular visits from Nathan, who writes about what he's learned on his railway blog. (Photo credit: aboywholovestrains.com) |
' I don't want kids, I just want to drive trains'
An excellent story in today's Toronto Star about a 7-year-old railfan and blogger from Toronto, whose love of trains has been recognized by Canadian Pacific.As the story by Rebecca Eckler tells, Nathan O'Neill is very into trains. But what sets him apart from his Grade 1 peers is that he started his own blog about them. His work was noticed by CP and the railway has hosted him for regular visits to learn about how the railway works.
He's climbed into the cab of a locomotive and even been issued his own engineer's vest. His blog is worth a visit, even if some of the photos are upside down!
In my favourite quote from the story, he tells Eckler: "I don't want kids, I just want to drive trains."
Nathan has had a ride on the CP Holiday Train and his grandparents bought him a share in CP (quite a gift considering the share price!)
It's nice to see a kid so interested in railroading, but it's also great to see CP recognize this and give him behind-the scenes access to their operation.
Obviously they got a nice PR boost with the Star story and maybe down the line they'll get an enthusiastic engineer in training!
Wednesday, 28 January 2015
Late January layout update
 |
| Basic level of ground cover is down here with many areas still needing ballast. I will go over all this ground cover again and fine-tune things. |
It's been a while since I've posted an update but I've been managing to get some work in on the layout. I've been doing a lot of ballasting, adding a few buildings and fixing some electric problems than have cropped up though regular running. I've also had to sort out problems with one pesky locomotive, the details of that problem I'll explain in another post.
New warehouse background building
 |
| This is a Walthers warehouse kit I tuned into a background structure. It's the longest spur on the layout. I may add tanks on the left side to make it more of a manufacturing plant that also takes plastic pellets as a way to add to the operating potential of this industry |
I've got to add roof details and a few other bits yet.
Quonset hut/maintenance area.
 |
| This little space will be a maintenance area. The quonset hut right next to the Lambton Yard office is similar to one on the prototype. |
This Quonset hut sits just to the left of the Lambton Yard office. It matches one on the prototype. I also stained a few wood pieces to represent tie piles. I plan to add extra rails, barrels, maintenance vehicles, dumpsters, etc. here.
Team track/transloading area
 |
| This is the team track. The pavement needs some weathering. This spur will take any kind of rolling stock. |
Here you see the team track area. The pavement is plaster stained with grey acrylic paint. It needs some weathering to make the colour less monochrome and a bit more dirty. Here I will add some containers, forklifts, loading docks, trucks and a modern prefab steel office/warehouse.
Hymopak
 |
| The plywood block at the back will become Hymopak, which is a plastics plant that makes shopping bags. |
I'm going to write a full post about this industry in the future but that plywood block at the back corner will be Hymopak, a large plastics company that makes take-home shopping bags, like the kind you get after buying stuff at Home Depot.
The prototype is a large brick building (with black corrugated steel trim) that takes plastic pellet hoppers. I've got a Walthers plastic pellet transfer station kit that I'm going to use for tanks here. I've also got some brick sheets to laminate to the wood.
Below is a bing screen shot image of Hymopak. I will be modelling one wall and four of the white tanks.
This work is all happening on one leg of the peninsula. The other side still has plenty of exposed pink foam board.
Below is a bing screen shot image of Hymopak. I will be modelling one wall and four of the white tanks.
 |
| A Bing maps aerial shot of Hymopak on Medulla Avenue in Etobicoke (West Toronto). This large industry takes rail delivery of plastic pellets (seen at the right) and turns them into shopping bags, like the kind you get at Home Depot. |
Two final wide shots
 |
| Here's an overall view from near the window looking to the left. |
 |
| Here's another overall view. looking to the left. The LaFarge cement silos will go in the back corner. |
This work is all happening on one leg of the peninsula. The other side still has plenty of exposed pink foam board.
My goal is to at least paint out all the pink before the end of winter.
Sorry it took so long to post an update!
Monday, 27 October 2014
New Korex photos
 |
| Here a trackmobile is coupled to a covered hopper. |
I was in the neighbourhood over the weekend and using a long lens from a parking lot was able to snap some pictures of rolling stock on the spurs at Korex.
I wrote about modelling this industry in this post. Some of the research about the industry I put here.

Here's a wide shot of the same hopper. Graffiti artists can't seem to resist the white canvas of these cars.

Detail shot of a short hopper on one of the tracks

Wider shot of a line of short hoppers here

Another rusty hopper on one of four tracks that serve Korex.
Saturday, 20 September 2014
A switch to Digitrax?
 |
| Due to a sale price too good to pass up, wireless Digitrax has arrived at the West Toronto Junction. Will it replace the popular NCE system already in service? Stay tuned for future updates. |
More than two years ago, shortly after I began construction
on my layout, I purchased an NCE PowerCab DCC system and I haven’t looked back. I
really like the system and I’ve since added three UTP panels and a Cab 04 so I
can walk around my room-sized switching layout and follow the train.
When I started building the layout and making my return to this great hobby after a long time away, I knew I wanted to go DCC right off the bat. I began to research the different systems. As many do, I
narrowed it down to Digitrax vs. NCE. I worked through all the pros and cons of
each system (as I saw them) and made my choice. I won’t repeat the factors I
chewed over in deciding to go with NCE, but you can read my old post about it here.
And although I like the NCE system very much, I always thought that if a reasonably priced used Digitrax
system came my way I might pick it up. Why?
- To have as a backup system.
- As a way to become familiar with arguably the most popular train control system out there.
- I’m considering getting involved in modular model railroading and it seems these groups almost always use Digitrax, though I’m sure there are some exceptions.
I figured the Digitrax starter set that would suit me best would be the Zephyr. But when I saw an ad in my area for a Super Empire Builder Xtra with Duplex (this one) for
$150, I jumped at it.
The deal also included a Digitrax PM42, which is a circuit breaker than can separately protect four different sections of a layout. It's an $80 value.
The system I bought had never been out of its box. The previous owner had decided
to get out of the hobby before they could execute a planned switch from DC to DCC.
Those of you familiar with Digitrax will know this was a
great deal. Digitrax lists the system’s MSRP at $575. The booster/command
station alone is worth at least $150. The Duplex equipped DT400 is more than $200.
Buying this system allows me to try out a Digitrax
system and operate my layout completely wireless instead of walking around, plugging and unplugging (though to be honest, I don't much mind this). Moving my NCE
system to wireless would require buying an RB02 (they’re about $140) plus buying
a radio equipped throttle or converting the ones I’ve got now to wireless.
 |
| I picked up this used Digitrax Super Empire Builder Xtra equipped with Duplex for $150. I plan to run the layout with this system for a while, then compare it with the NCE system in a future post. For now it's fun to operate wirelessly and become familiar with this popular train control system. |
Discovering the Digitrax
Before I could try
out the Digitrax, I had to buy an AC adapter to power it. One complaint I've heard about Digitrax is that some of their starter sets, including the pricier ones,
don’t come with a power cable. This was no big deal for me, I picked up one for $9 at
a surplus electronics store near my work. It's essentially the same one I once had for an IBM laptop.
When I got home, I unplugged the feeders from my PowerCab
because I didn’t want the two systems both trying to run my layout at the same
time, for obvious reasons! I powered up the Digitrax system, connected it to
the layout’s power bus and after a few minutes working through the startup
guide, I was running trains wirelessly from the DT400D.
I plan to write a future post that offers some detailed observations about how these two systems compare, so I’ll stay away from any “review type” comments for now.
 |
| For now the Digitrax will operate while sitting loose my workbench. Should I decide to keep it and sell the NCE stuff, I will install the DB 150 and the UR92 panel inside the layout fascia. |
So am I selling my NCE system?
I now have the option of keeping the system I like best
and selling the other. Each would make an attractive package to a modeller. I’m
certain I could get more for the Digitrax system than I paid for it, if I opted
to sell it and stick with NCE. My NCE stuff is in great shape and I have all the boxes, manuals, etc.
For now at least, I’ll likely keep the Digitrax even though I do acknowledge the silliness of owning two very
robust DCC systems for what is a rather small HO scale layout.
I have heard other modellers who possess both Digitrax and NCE products, even if only a throttle, so they can bring their throttles while operating at another layout.
So stay tuned for future updates as I discover the Digitrax and compare and contrast it with the NCE.
I welcome your comments on all this.
Subscribe to:
Posts (Atom)